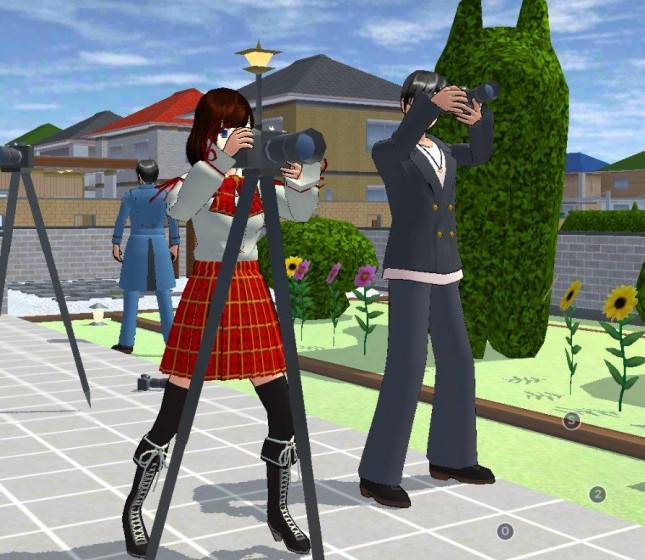
The new Sun setting in Sakura School Simulator gives players a temptation: turn every visual option to its maximum and expect better pictures. But bigger draw distance is not a photography style. A face can still be lost in shadow, the background can be too busy and the strongest light can arrive from the wrong direction.
Garusoft’s late-October 2026 update added adjustable sun positioning and a longer display-distance option for high-spec devices. Those tools can help, but good screenshots start with composition. This guide focuses on the visual decisions you can make without treating a 700-meter draw distance as a requirement.
Highlights
- The Sun weather option and adjustable sun angle were introduced in version 1.048.18.
- The 500m and 700m display-distance options are limited to high-spec devices and consume more battery.
- Foreground subjects usually benefit more from clear lighting and framing than distant scenery.
- Take one screenshot at a time and compare them before changing several settings together.
- Keep a low-detail fallback for phones that become hot or start dropping frames.
Quick answer: For better Sakura School Simulator screenshots, position the subject, simplify the background and adjust the sun angle to reveal the face or building. Leave 700m view distance for scenes that genuinely show faraway scenery.
Table of Contents
- Start by deciding what the picture is about
- Understand the 2026 sunlight controls
- Why maximum view distance is rarely the answer
- Build layers with ordinary town scenery
- Use a repeatable four-picture test
- Share screenshots without overstating what they show
- Frequently Asked Questions
Start by deciding what the picture is about
A good screenshot usually has one subject: a character, a building entrance or a small interaction. Decide which before touching the camera. If the subject is an outfit, move closer and use a simpler background. If you are photographing a courtyard, step back so the architecture and paths have room in the composition.
Try the three-shot test. Capture one wide view, one medium view and one close view without changing the story. On a phone screen, the medium frame often works best because the subject is visible while the setting still provides context. That is a creative observation, not a promise that the game will automatically choose the ideal shot.
Understand the 2026 sunlight controls
According to the documented 1.048.18 notes, the game introduced a Sun choice under Weather in Game Setting, with a visible sun by day and moon at night. The angle can be adjusted. Players who followed much older tutorials may not find exactly the same options because their app version may differ.
Change the angle gradually and inspect the shadows. Strong light behind a character can create an atmospheric silhouette, but it is poor for showing makeup or clothing detail. Side light can make flat walls look less flat. If you want a clean portrait, aim for a position where the face is readable without a harsh dark band across the eyes.
Why maximum view distance is rarely the answer
Display distance controls how much distant scenery is drawn, not whether the main subject looks interesting. Garusoft says the 500m and 700m options are for high-spec machines, and the increased distance uses more battery. An indoor portrait, small café or close-up of a costume will often gain very little from that extra rendering work.
Use the default or a moderate distance when photographing a small scene. Increase it only for wide landscape images where distant buildings are part of the story. If your frame rate falls while taking a screenshot, reduce the workload first. A smooth, well-timed image is more valuable than a technical setting number.
Build layers with ordinary town scenery
Look for a foreground shape, a middle subject and a background. A tree or doorway can frame a character; the character stays in the middle; the school grounds provide context. You do not need a complicated Props download for this. Many recognizable views are already part of the game.
Watch out for objects that appear to grow from a character’s head, such as lampposts or branches directly behind them. Shift the camera slightly before you take the shot. When photographing buildings, avoid standing too close to one corner with an extremely tilted angle; it makes straight lines difficult to read.
Use a repeatable four-picture test
Take picture one with your usual setup. For picture two, change only the sun angle. For picture three, return to the preferred lighting and move the subject nearer to the camera. For picture four, simplify the background by changing your position. Compare all four on the same phone display rather than relying on memory.
This approach makes troubleshooting straightforward. If picture two is better, the change was probably lighting. If picture three wins, the issue was composition. If none works, reconsider the scene itself. Testing one variable at a time is especially useful on devices where changing graphics options can interrupt your flow.
Share screenshots without overstating what they show
When posting images, it helps to say whether the scene uses ordinary locations, custom Props or edits added outside the game. A dramatic sky from an editor and a built-in Sun setting are not the same thing. There is nothing wrong with editing for color or framing, but readers appreciate knowing which parts they can reproduce.
If a particular sun-angle menu is missing, check the installed version and platform before searching for unofficial APKs. Game updates may arrive on Android and iOS on different schedules. Keep the article’s instructions tied to the documented feature, rather than guaranteeing every device shows exactly the same interface.
Frequently Asked Questions
When was the Sun setting added?
Garusoft’s Android 1.048.18 update, dated October 31, 2026, introduced the option.
Is 700m display distance necessary for portraits?
No. It mainly affects faraway scenery and is intended for high-spec devices.
Why does the sun setting look different on my phone?
Check your game version and platform; feature rollout and menu layout can differ.
Should I photograph with the sun behind the character?
Only if you want a silhouette. Side or front-side lighting is usually easier for showing details.
Can I get better photos without custom Props?
Yes. Framing, character placement and ordinary town backdrops already offer plenty of creative options.
Final Thoughts
The most useful new photography feature is not the headline-grabbing distance number. It is the extra control over where the light comes from. Combine a clear subject with patient framing, and a normal Sakura Town street can make a better image than a crowded custom scene rendered at maximum settings.
Read also: Sun weather and 700m display-distance update