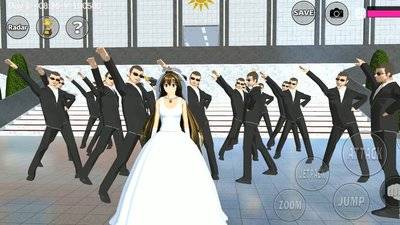
- You can build an ice cream cart in Sakura School Simulator using basic prop shapes such as cubes, cylinders and spheres, with no mods.
- The cart body is one long cube, the wheels are cylinders and the umbrella is a flat cylinder on a pole.
- Small pastel spheres stacked on small cylinders make convincing ice cream cones.
- A glass material cube works as the front display so the ice cream shows from outside.
- The cart is perfect for selling roleplays at parks, schools or near the amusement park.
An ice cream cart is a simple but fun Sakura School Simulator props build for selling roleplays. Every part can be made from basic shapes in the props menu, without any mods.
Small props builds are popular with Sakura School Simulator players because they are quick to make and do not use up much of the props budget. After claw machines, cafes and treehouse escape rooms, snack carts are a great next project because they can appear anywhere in a story.
This guide uses common basic shapes in props, such as cubes, cylinders and spheres, and adjusts size, color, position and material. Menu names may vary slightly between versions, but the steps stay the same.
Quick answer: Open props from your character's phone, make the cart body from a long cube, add two cylinder wheels, a thin cylinder pole with a flat cylinder umbrella, and a glass cube display at the front. Fill the display with small pastel spheres on small cylinders as ice cream, and the cart is ready for roleplay.Before You Start
Pick a flat, open spot such as a park near the school or a sidewalk downtown. Flat ground makes it easier to keep the cart level.
Choose a color palette first. Ice cream carts usually use bright colors such as white, pink, light blue or yellow, and deciding early keeps the result tidy.
Save the game with the SAVE button at the top of the screen so your progress is safe if the game closes while you are placing props.
Steps to Build the Ice Cream Cart
Follow this order so the parts line up neatly and are easy to fix if something slips.
| Part | Prop shape | Settings |
|---|---|---|
| Cart body | Cube | About twice as long as it is tall, white or pastel |
| Wheels | Cylinder | Rotated 90 degrees, black, one on each side |
| Push handle | Thin cylinder | Angled at the back |
| Umbrella pole | Thin cylinder | Upright at the center or one end |
| Umbrella | Flat cylinder | Wide, striped or pink |
| Display case | Glass material cube | On the front top of the cart body |
| Ice cream | Small sphere on small cylinder | Pastel sphere, light brown cylinder |
Start with the body, since everything else attaches to it. Then place the wheels slightly below ground level so they look grounded.
For the umbrella, set up the pole first and put the flat cylinder on top. For stripes, duplicate the flat cylinder in a different color and stack it slightly smaller.
Make the display from a cube with its material changed to glass, then place a few ice creams inside so they show from outside.
Details That Make It Look Real
Add a sign from a thin cube on the side of the cart in a contrasting color. It can carry your shop name during roleplay.
Make a few small stools from short cylinders around the cart for customers to sit on.
Use different sphere colors for flavors, such as pink for strawberry, brown for chocolate and pale green for matcha. Stack two spheres on one cone for a double scoop.
If your version has a copy or group feature, duplicate the whole cart to make several carts in different colors quickly.
Roleplay Ideas With the Ice Cream Cart
After-school sales: park the cart at the school gate and make your main character the vendor surrounded by student NPCs.
Summer festival: line up several snack carts in the park with lantern decorations for a festival mood.
Park date: use the cart as a meeting spot for two characters, then capture the moment with the camera at the top of the screen.
Vendor rivalry: build two carts in different colors facing each other for a funny story about competing for customers.
FAQ (Frequently Asked Questions)
Yes. Every part uses basic prop shapes such as cubes, cylinders and spheres available in Sakura School Simulator. Use small pastel spheres on small light brown cylinders as cones. Create a cube, change its material to glass and place it on the front top of the cart body. Flat areas such as parks, school gates or downtown sidewalks so it stays level and easy to reach. Not really. A simple cart needs only a dozen or so props, far fewer than a house or cafe.1. Can I build an ice cream cart without mods?
2. Which props make the ice cream?
3. How do I make a see-through display?
4. Where is the best place for the cart?
5. Does the cart use a lot of props?
Conclusion
An ice cream cart is an ideal beginner props project in Sakura School Simulator: few shapes, instantly cute results.
Once you have it, reuse the same idea for other food carts, such as meatball soup, grilled sausages or drinks, just by changing the colors and display contents.
- The cart is built from cubes, cylinders and spheres with no mods.
- The display uses a cube with glass material.
- Ice cream is a pastel sphere on a small cylinder.
- Great for selling roleplays, festivals and park dates.